AVAILABLE IN HO AND S (OCCASIONALLY!)
The Rose-Walsh Smelter was located on the outskirts of Silverton, Colorado. First constructed in 1882, it only managed to operate for a few months before shutting down. Apparently, the process used to separate precious metals from the ores was not practical -- a frequent problem with Colorado's smelters at the time. The facility sat dormant for the next eight years until it was renovated in 1894. It operated successfully for the next four years, shutting down for good in 1897, after treating approximately 100,000 tons of ore. For the next 100+ years the facility was allowed to slowly disintegrate. Most recently, a site cleanup was performed and housing is now stands where heavily loaded narrow gauge steam trains once ran and hot, precious metals once flowed.
Although the model is large, the prototype would probably only classify as "small" to "medium" when compared to other smelters of its day. It's certainly smaller than the plants located downstream in Durango. In its heyday, the Rose-Walsh was capable of handling 100- to 140-tons of ore per day and required up to 30-tons of limestone per day. In addition, large amounts of both coke and coal were needed to fuel the boiler and blast furnace. At one point, the Silverton Railroad was delivering 15 boxcars of ore a day, all unloaded by strong backs.
The kit includes the Ore House, the Blast Furnace Building, 22 open Ore Bins along the back side (served by the Receiving Shed) and three Supply Bins (coke, limestone, and coal). Also included are the Tailings Tower, the discharge trestle, and the Office/Assay Building.
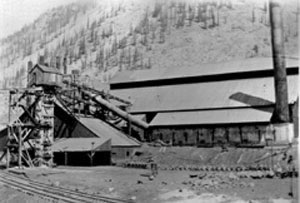
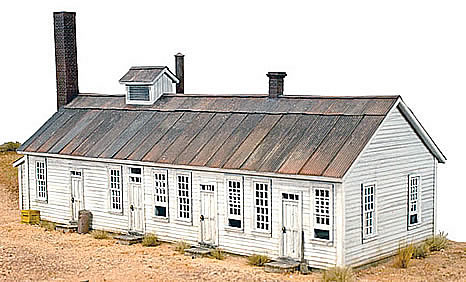
Prototype photos of the Rose-Walsh smelter are somewhat rare. The attention the site received for the recent "clean up" action resulted in more photos becoming available. But for the size of the facility, it's surprising how few have survived. Compare this photo to the model, below.
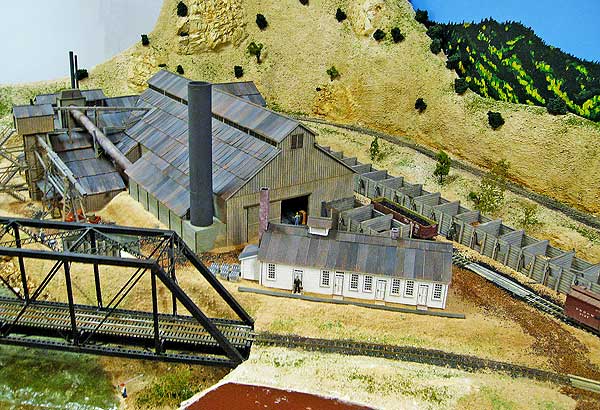
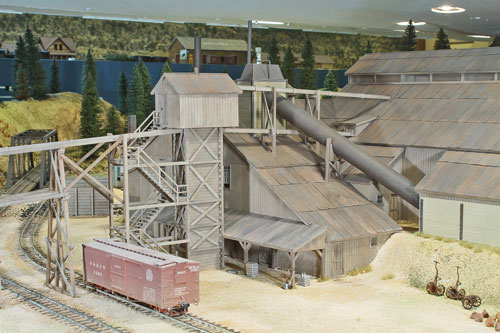
The main Ore House, Receiving Shed, and Ore Bins were elevated above the floor of the Blast Furnace Building, making it easier to charge the furnace. The model includes this feature. The covered Loading Area in front of the Blast Furnace Building is where the ingots were stacked before they were loaded into boxcars on the siding. When the Blast Furnace was tapped, the molten waste flowed into Slag Carts, seen in the lower right side of both photos. The waste cooled in the carts and was then dumped as solid "buttons" (my terminology). Later it was hauled away by the railroad. (Ingots and Slag Carts are no longer available as detail parts. Sorry!)
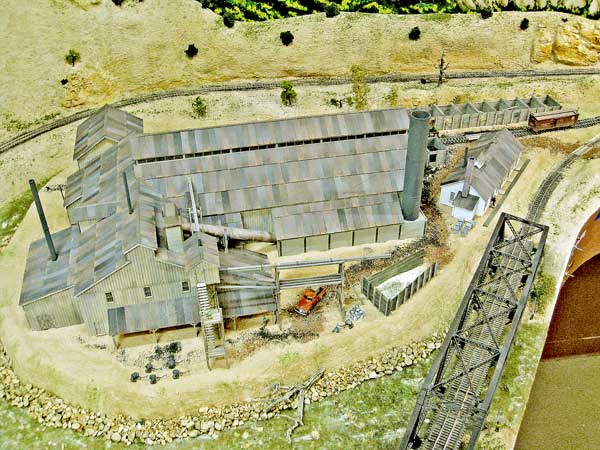
What I've labeled the Tailings Tower is actually called a "Granulator". Apparently, the waste was hard enough that it could be used as ballast on the railroads and was in demand. I'm not familiar with the process, but two wooden box-like troughs were connected to the tower, probably serving as supply and return conduits. A third trough departed the tower on the trestle to discharge the material. The kit includes four pre-cut bents, bracing, and trough material to build a waste or "tailings" dump about 16-inches long in HO.
All but the lowest grade ore was shipped to the smelter in boxcars, where it was unloaded by hand -- as much as 140 tons per day. I assumed a tram was used to transport the ore into the facility, so I made one from scrap rail, as shown (not included in kit).
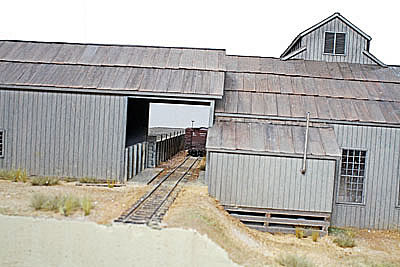
One of the two tracks serving the bins passed through the Receiving Shed. The Shed may have served as a scale house and/or they may have unloaded ore here under the roof and trammed it directly into the facility...?
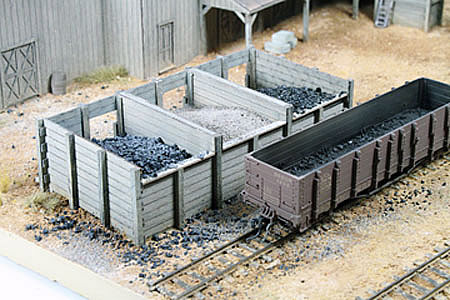
The facility required as much as 30-tons of limestone per day as a flux in the process. Coke and coal were also needed for the boiler and blast furnace.
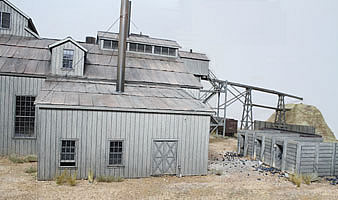
The Boiler Room was an addition to the Blast Furnace Building and added yet another smoke stack to the facility.
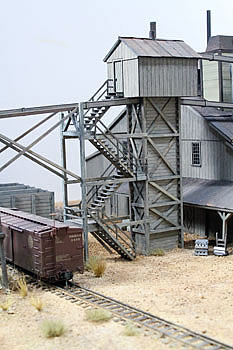
The "Granulator" was not part of the original design, but added later. A very neat feature to include on your model!
The Office/Assay Building was the "business" end of the facility. Besides all the usual tasks of record keeping, payroll, and management, the left end of the stucture incorporated a laboratory where ore samples from the various customers were tested for metal content.
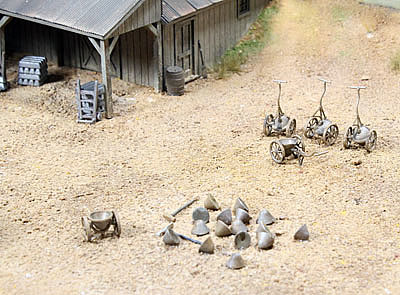
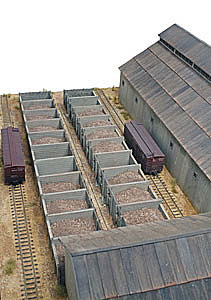
Rows of slag carts and piles of waste "buttons" were unique to smelters.
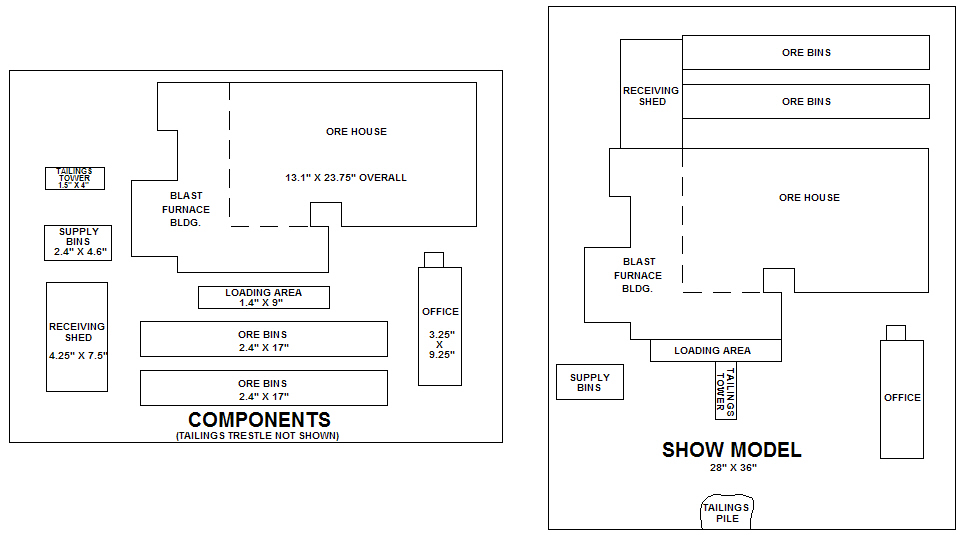
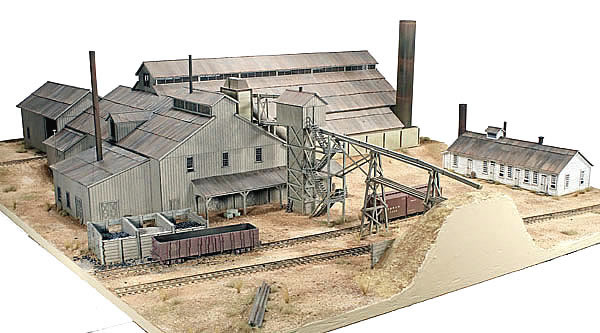
Just how large IS the model? It's very flexible, depending on your space. The HO footprints for the various components are indicated above, as well as the overall dimensions of the Show Model. By no means does your model need to be configured as the Show Model. The Show Model comes close to how the prototype was arranged, although some changes were made to allow it to be more easily transported. I suggest you make full-sized templates of each structure and see how best to arrange them in your space. Keep in mind that the Ore House and Blast Furnace Building are basically one structure, although not impossible to build separately. Components to consider relocating are the Ore Bins, Supply Bins, Receiving Shed, Loading Area, Office, Tailings Tower, and Tailings Pile. The kit includes directions and a few alternate parts to allow these components to be rearranged. Remember to include space for one or two sidings, and that the floor of Ore House is 1-inch (25-mm) higher (1.5-inches higher in S) than the floor in the Blast Furnace Building.
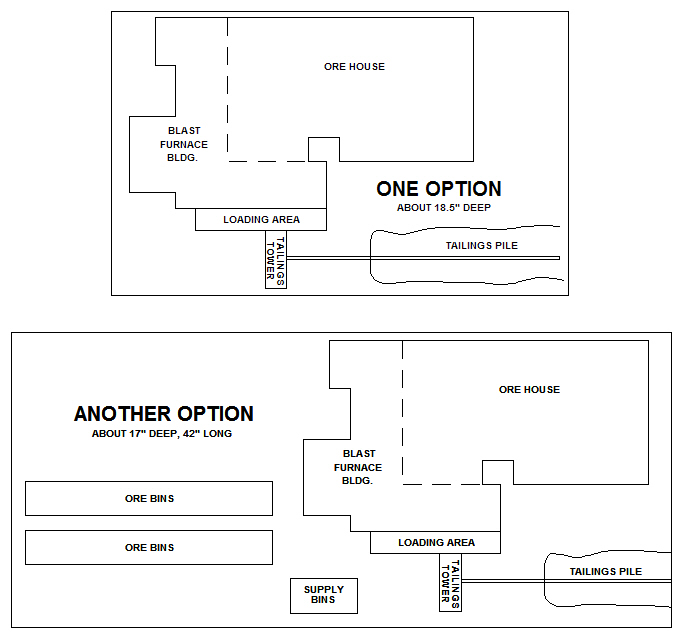
The arrangement of the structures depends most on the depth you have available. The above illustration show just two additional possibilities. With a little more work, the depth could be further reduced by turning the Tailings Tower 90-degrees to the Blast Furnace Building and running it off to the right. In the tightest of spaces, the Loading Area can be eliminated entirely.
Do you have the skills to build such a large kit? If you've built any laser-cut kit in the past, you should be able to construct the smelter. It takes no special skills. You will need patience -- there's a lot of work involved -- and an inherent knack to stay organized. There's a LOT of parts in this kit, and you DON'T want to get them confused. I've been told the kit includes more than 3000 parts!
As with ALL of our kits, the instructions are very thorough. Nearly 80 pages in all, spiral bound (they lay FLAT!), with large print. They walk you through the construction from start to finish (very much like the old Heath Kits). They include detailed suggestions for both the products and the process for applying the various finishes to your model, as well as adhesives and tools you might need. Of the nearly 800 photos that were taken during the construction of the Show Model, 172 are included in the manual, illustrating nearly every part's location, all keyed to the text and five Parts Layout Diagram pages.
DAVE THOMPSON'S ROSE WALSH SMELTER:
Dave Thompson is an excellent HOn3 modeler and assembled one of the first kits we shipped. Dave had an area with an old mill on his layout that he was never happy with, so he adapted the Rose-Walsh to fit the existing space. He made some very creative changes that I thought you might want to consider for your own situation.
The first change Dave made was to shorten the Receiving Shed and combine the two rows of Ore Bins into one, making the entire facitlity more triangular and better fitting a corner area.
The second major change involved the "Tailings Tower", more appropriately called the GRANULATOR. Dave moved the tower directly up against the front wall of the Blast Furnace Building, insetting it into the Loading Area's roof. That narrowed the depth of the structure enough to allow him to keep his river in place. He also exercised one of the kit's options and built the Tower's discharge going off to the side. He used the Supply Bins as a "waste bin" for the tower's discharge. In retrospect, Dave thinks it would have been neat to route the Tower's waste trestle across the river with the "waste dump" located there. Something to consider!
Finally, the Office was located parallel to the RGS's mainline. The D&RGW's mainline is behind the structure. Dave's railroad is truly one you should visit if you ever have the chance!
THE S MODEL:
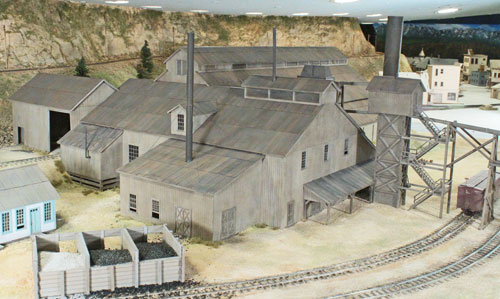
Other than the actual model dimensions, nearly 100% of the above discussion (and photos) apply to the S-scale smelter kit. Because of its size, I had to modify the model slightly and rearrange components to fit my space. I thought you may be interested in seeing another application. Here's a few of the first pictures of my installation. Much detailing is yet to be added.
THE S-SCALE SMELTER
The above photo depicts the S smelter from the opposite angle. Note that only one row of ore bins could be located behind the smelter due to space limitations, but the Granulator Tower still fit between the main building and the siding/main line tracks provided I inset it about 0.5-inch into the Loading Roof Area. The second row of ore bins is located behind the Office (lower left corner of photo). Tram tracks serve both sets of bins and enter the abbreviated Receiving Shed (an option included in the kit) located behind the Blast Furnace Building.
LOADING ROOF AREA AWATING ADDITIONAL DETAILING
Note in the above photo how the Main Ore Building (as well as the Receiving Shed and Ore Bins) are all located 1.5-inches higher than the Blast Furnace Building. This was done by using builder's insulation foam board. Additional details will be added as time permits and I will update the photos.
PURCHASING:
CLICK HERE TO PURCHASE THE COMPLETE HO-SCALE SMELTER, $535
IF THE S-SCALE SMELTER IS AVAILABLE, IT CAN BE ORDERED ON OUR HOME PAGE.